

FTP Server on Windows Server – To install an FTP server on Windows Server 2019, you can use the FTP Server feature provided by the Internet Information Services (IIS) role.
FTP Server on Windows Server, FTP an acronym for File Transfer Protocol, is a standard protocol for sharing files over the internet or a simple LAN. FTP servers have existed for over 30 years and have facilitated file sharing in a simple, yet effective manner.
Nowadays, FTP has been replaced by more secure options, such as SFTP (Secure File Transfer Protocol) and FTPS (FTP over SSL), that encrypt data sent to and from the servers. Nonetheless, it’s prudent that we appreciate the basics of installing an FTP server and see how it can be configured for simple file sharing.
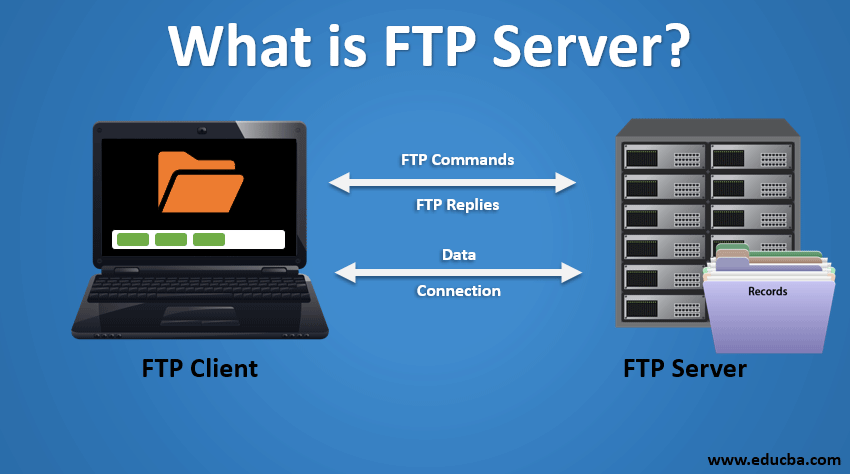
Here are step-by-step instructions:
Install FTP Server on Windows Server 2019:
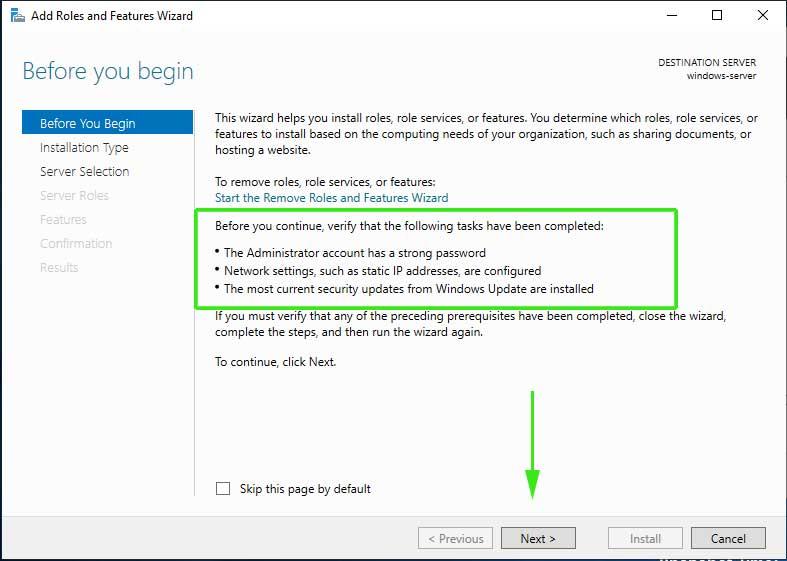
- Open Server Manager:
- Launch Server Manager on your Windows Server 2019 machine.
- Add Roles and Features:
- In the Server Manager dashboard, click on “Manage” in the top right corner.
- Select “Add Roles and Features.”
- Role-Based or Feature-Based Installation:
- Choose “Role-based or feature-based installation” and click “Next.”
- Select a Server:
- Ensure that your server is selected and click “Next.”
- Choose Role:
- In the “Select server roles” section, scroll down and find “FTP Server.” Check the box next to “FTP Server” to select it.
- Add Features:
- Click “Add Features” when prompted to add the required features. Click “Next.”
- Web Server Role (IIS):
- As FTP Server relies on the Web Server (IIS) role, you might be prompted to add the required features for IIS. Click “Add Features” and then click “Next.”
- FTP Server Role Services:
- In the “Select role services” section, select the necessary FTP services:
- FTP Server
- FTP Service
- FTP Extensibility
- In the “Select role services” section, select the necessary FTP services:
- Click Next:
- Click “Next” through the remaining screens until you reach the “Confirmation” screen.
- Install:
- Review your selections and click “Install” to begin the installation process.
- Completion:
- Once the installation is complete, you will see a summary. Click “Close” to exit the wizard.

- Once the installation is complete, you will see a summary. Click “Close” to exit the wizard.
Configure FTP Server:
- Open IIS Manager:
- Open the Internet Information Services (IIS) Manager from the Start menu.
- FTP Site Creation:
- In IIS Manager, expand the server node, right-click on “Sites,” and choose “Add FTP Site.”
- FTP Site Wizard:
- Follow the FTP Site Creation Wizard, providing the necessary information such as:
- Site name
- Physical path (the location where your FTP content will be stored)
- Binding (IP address and port)
- Follow the FTP Site Creation Wizard, providing the necessary information such as:
- FTP Authentication:
- Choose the authentication method for your FTP site (Anonymous or Basic).
- Authorization:
- Configure authorization settings based on your requirements.
- Finish:
- Complete the wizard, and your FTP site will be created.
- Additional Configuration (Optional):
- You can further configure FTP security settings, user isolation, and other features based on your needs.
- Start FTP Site:
- In IIS Manager, select your FTP site, and click on “Start” in the right-hand Actions pane.
- In IIS Manager, select your FTP site, and click on “Start” in the right-hand Actions pane.
Your FTP server should now be installed and configured on Windows Server 2019. Users can connect to the FTP server using an FTP client by entering the server’s IP address or hostname, along with the appropriate username and password if required.