Schedule Backups in Plesk Panel – Backups are crucial for maintaining the integrity of your data, whether you’re running a small blog or managing multiple websites.
Plesk Panel makes it easy to schedule backups so you can ensure that your data is regularly saved without manual intervention. In this guide, we’ll walk you through the process of scheduling backups in Plesk Panel.
Schedule Backups in Plesk Panel – Step 1: Log in to Plesk Panel
- Access Plesk Panel: Open your web browser and navigate to the Plesk Panel login page. This is usually found at
https://yourdomain.com:8443or a similar URL provided by your hosting provider. - Enter Credentials: Log in with your admin credentials.
Step 2: Navigate to Backup Settings
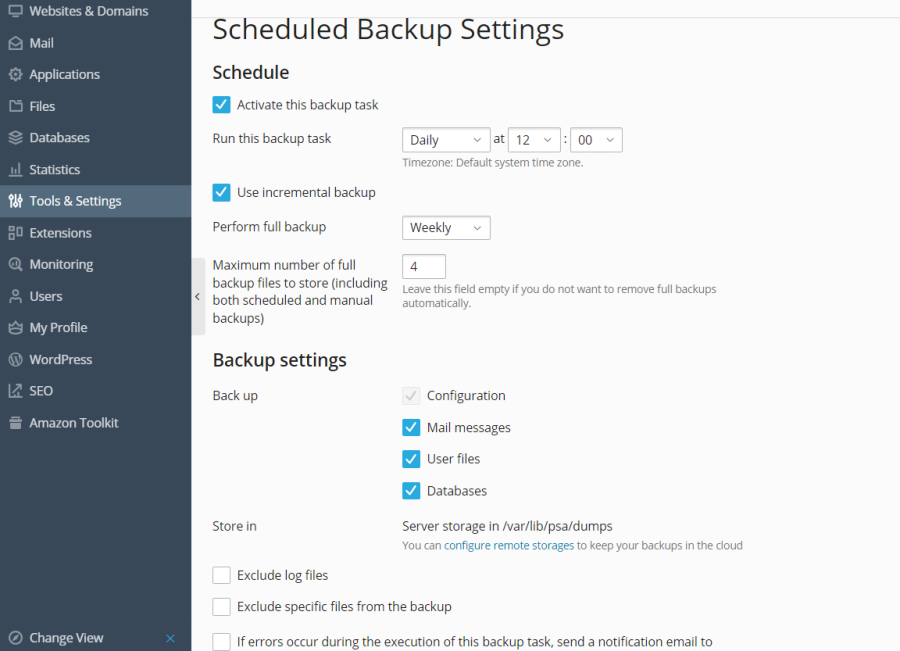
- Go to the Tools & Settings: On the left sidebar, find and click on the “Tools & Settings” tab. This will take you to the administrative settings for Plesk.
- Find Backup Manager: In the “Tools & Settings” section, locate and click on “Backup Manager.” This will open the backup management interface.
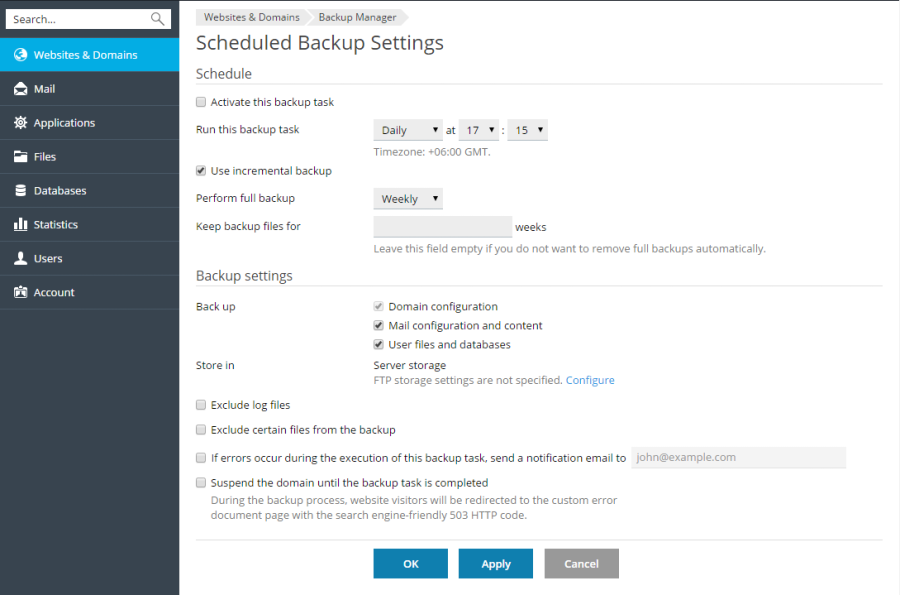
Schedule Backups in Plesk Panel
Step 3: Configure Backup Settings
- Add a New Backup Schedule: Click on “Schedule Backup” or “Add New Backup” depending on your Plesk version.
- Choose Backup Type: Select the type of backup you want to schedule. Plesk typically offers options like full backups or incremental backups.
- Full Backup: Includes all files, databases, and settings.
- Incremental Backup: Includes only changes made since the last backup.
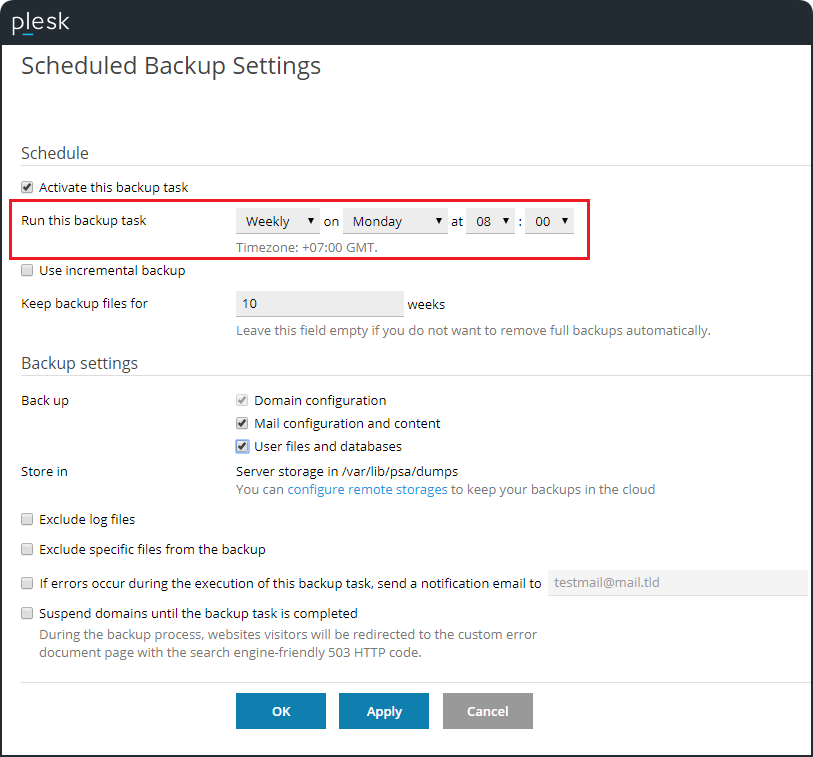
- Set Backup Frequency: Choose how often you want the backup to occur:
- Daily
- Weekly
- Monthly
- Custom: Define specific days and times for the backup.
- Specify Backup Time: Set the exact time for the backup to start. Make sure this time doesn’t coincide with high traffic periods to avoid potential performance issues.
Schedule Backups in Plesk Panel
Step 4: Define Backup Destination
- Select Destination: Choose where you want the backups to be stored. You can typically select from:
- Local Storage: Save the backup files on the same server.
- Remote Storage: Save backups to an external server or cloud storage (e.g., FTP, SFTP, Amazon S3).
- Configure Remote Storage Settings: If you choose a remote storage option, you’ll need to enter the connection details (e.g., server address, username, password).
Schedule Backups in Plesk Panel
Step 5: Set Backup Retention Policy
- Define Retention Rules: Decide how long you want to keep each backup. You can set rules such as:
- Keep backups for a specific number of days
- Keep a certain number of backups
- Delete old backups automatically
Step 6: Save and Apply Settings
- Review Your Settings: Ensure all your settings are correctly configured.
- Save the Schedule: Click “Save” or “Apply” to activate the backup schedule.
Step 7: Monitor and Verify Backups
- Check Backup Status: Periodically check the Backup Manager to ensure that backups are running as scheduled.
- Verify Backup Integrity: Occasionally test restoring from a backup to confirm that the backups are valid and complete.
Schedule Backups in Plesk Panel
Tips for Effective Backup Management
- Regularly Test Backups: Ensure that your backups are functioning correctly by performing test restores.
- Keep Backup Storage Separate: For added security, store backups on a separate physical or cloud location.
- Monitor Disk Space: Ensure there’s enough disk space for storing backups, especially if you’re using local storage.
Conclusion
Scheduling backups in Plesk Panel is a straightforward process that can save you a lot of stress and potential data loss. By following these steps, you can ensure that your data is regularly and securely backed up, giving you peace of mind that your information is safe and recoverable in case of any issues.